Of course, you can isolate things by running a tool like NVM, RBEnv, or PyEnv. But there is still a risk of doing something to your system that will break things, causing you to spend loads of time fixing your setup for your current main project.
But, what if there was a simple and easy way to explore a codebase without installing "stuff" all over your main operating system?
Stream writes most of its developer documentation with a tool called Docusaurus. The developers have their documentation in markdown, and it is very straightforward to convert those markdown files into something that looks good and works great. Docusaurus is a fantastic tool for this.
In my role within developer relations, I tend to look at all kinds of technology stacks, each with different requirements and dependencies. I want to experiment with things I find online. The same holds for Docusaurus documentation. I want to know how other documentation sites do some neat-looking things on their site so that we at Stream can do something similar.
Docusaurus is a JavaScript tool, and all projects I look at online are likely not using the same version of the tool.
Often, when having experimented with a new tool or project, my local development environment ended up broken beyond repair. I just want to get back to work after a few thought provoking experiments. I want to apply what I just learned right now. Instead, I have to rebuild my development setup, going over notes, and tearing out what’s broken so I can get back in a workable state again. Painful, time-consuming, and just not a lot of fun.
As Canonical states on its website.
Ubuntu VMs on demand for any workstation
Get an instant Ubuntu VM with a single command. Multipass can launch and run virtual machines and configure them with cloud-init like a public cloud.
This sounds very interesting, so let's explore.
(I will assume MacOS since I am running that myself. But the only real difference between the host operating system you are using is at the start. After the installation of the multipass tool onyourOS, there are no differences.)
Getting started is very simple. Install Multipass with Homebrew and get going:
$ brew install --cask multipass
# Wait for a bit to let things install, and then:
$ multipass shell
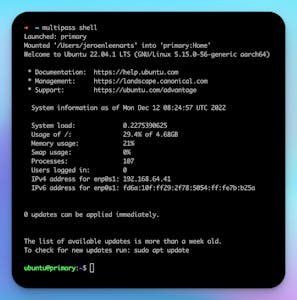
Notice what that single command just did? It created, launched, and logged you in on an Ubuntu virtual machine.In there we can do all kinds of fun things,this is just the start.
The Multipass website mentions cloud-init in pretty much the first sentence. I think it is an important feature of Multipass.
So what is cloud-init?
The website of cloud-init explains it quite well:
“Cloud images are operating system templates, and every instance starts out as an identical clone of every other instance. It is the user data that gives every cloud instance its personality, and cloud-init is the tool that applies user data to your instances automatically.”
Let’s apply a cloud-init script to our freshly baked virtual machine, get some standard packages in place, and add your SSH credentials.
Let's start scripting:
#!/bin/zsh
# store this script in a file called: mkvm
# Take the first argument of the script and store it as VM_NAME
VM_NAME=$1

# This is where we apply the cloud-init script.
# We launch a VM named with the contents of VM_NAME, give it 2 Gb of ram, and initialize it with a cloud-init configuration
/usr/local/bin/multipass launch -n $VM_NAME -m 2G --cloud-init ./cloud-config.yaml

# Connect to my freshly baked VM.
# See how we use the "local" TLD?
# More on that in the cloud-init configuration
#
# Also note the -A flag I am passing, this allows this connection to do SSH Agent forwarding.
/usr/bin/ssh -A ubuntu@$VM_NAME.local
As mentioned, the above script uses a cloud-config.yaml. Let's take a look at the contents of cloud-config.yaml:
#cloud-config
# store this script in a file called: cloud-config.yaml
users:
  - default
  - name: ubuntu
    gecos: Ubuntu
    sudo: ALL=(ALL) NOPASSWD:ALL
    groups: users, admin
    shell: /usr/bin/zsh
    ssh_import_id: None
    lock_passwd: true
    ssh_authorized_keys:
      - < paste the contents of the public key of the SSH keypair you want to use when connecting to this VM >
package_update: true
package_upgrade: true
packages:
  - zsh
  - avahi-daemon
Some basic steps are taken in this cloud-init config. First, the user defaults are configured so all users can use SUDO without entering a password. You would never ever do this in production. But, for convenience in a throwaway VM this is very handy.
I also prefer the Z Shell. It is the default on macOS, so to keep the difference minimal, I tend to prefer that one. If you want to use Bash, replace the shell: /bin/zsh with shell: /bin/bash.
Password changes are not allowed.
And most importantly, I copy the contents of the public key pair I want to use when connecting. If you have your main key pair stored in id_rsa and id_rsa.pub (the default), you can copy your keypair on a Mac using: pbcopy < ~/.ssh/id_rsa.pub Paste what's in your paste buffer, replacing the text between the angle brackets. It should look something like: ssh_authorized_keys: ssh-rsa …
After that, I added two statements to update the package index of the VM and to upgrade all packages. This does take a bit of time, but this way, the entire VM is fully up to date. Since it is a fully hands-off operation, I am ok with this.
Finally, I install Z Shell and avahi-daemon. The avahi-daemon is a fun one. It enabled your machine to be discoverable by its hostname on the local top-level domain. This way, you don't have to find the IP address of the VM. You just need to know the hostname.
As a final cleanliness step, I also have a teardown script.
#!/bin/zsh
# store this script in a file called: rmvm
VM_NAME=$1

# Deletes the VM from multipass
/usr/local/bin/multipass delete $VM_NAME

# Removes any remnants of the VM from multipass
/usr/local/bin/multipass purge

# Removes any references from you accepted remote hosts from your SSH config
/usr/bin/ssh-keygen -R $VM_NAME.local
`
Put the contents of all three files in the same directory:
$ ls -l
-rw-r--r--  1 … cloud-config.yaml
-rwxr-xr-x  1 … mkvm
-rwxr-xr-x  1 … rmvm
$
(I removed some of the detail on timestamp and exact usernames.)
If you do not see the executable permission (x) on your files, then run:
$ chmod +x *vmTo allow your local terminal to forward your credentials to the Multipass VM's terminal, you should run ssh-agent.
SSH Agent is part of the SSH toolset and it is a tool that allows you to load specific keys into memory ready for use. When using the SSH Agent you can do something called SSH Agent forwarding. In the SSH protocol a mechanism is defined that allows SSH keys to be used over an active SSH connection. The best part is, your private keys are NOT sent to the remote server. Instead, the remote server can let your local machine run private key specific operations on your machine.
Here's how you run ssh-agent. The eval step is important, since it evaluates the output of ssh-agent. (It sets an environment variable with the ssh-agent's proces ID.)
$ eval ssh-agentOnce you ran that, you can run ssh-add to add your default SSH key.
$ ssh-addIn case you want to use a non-default SSH key, you can use the -L argument.
# Run this command when you want to load a non default key into your ssh-agent.
$ ssh-add -L ~/.ssh/my-specific-key$ ./mkvm demo$ ./rmvmIn case you are done with a VM and want to connect to it again later, you are just one SSH command away.
# Note the -A parameter to allow SSH Agent forwarding. And if it is not working, make sure you have a terminal session with an active SSH Agent running and that your key is loaded into SSH Agent.
# Check loaded keys with: ssh-add -L
$ ssh -A ubuntu@demo.local
Also, when at the end of the day you want to stop all VMs and start them again in the morning:
# Stops the VM named demo
$ multipass stop demo

# Starts the VM named demo
$ multipass start demo
If you happen to switch networks, it can be necessary to restart the VMs as well.
Now, let's take the example we mentioned at the start of this article and bring it home using all of the things we discussed.
In the directory with the scripts we created:
# The name is just for convenience
$ ./mkvm docsYou will end up in a new terminal window, which is the Ubuntu VM. Run the following commands one by one:
# Make sure the zshrc file exists so the next step can put a config somewhere
$ touch ~/.zshrc

# Install NVM to manage Node packages
$ curl -o- https://raw.githubusercontent.com/nvm-sh/nvm/v0.34.0/install.sh | zsh

# Source the .zshrc file to add NVM to the execution path
$ source ~/.zshrc

# Install node version 16
$ nvm install 16

# Install yarn globally
$ npm install --global yarn

# Create the directory code
$ mkdir code

# Clone the Stream Swift SDK code into code/stream-chat-swift
# Use `https://github.com/GetStream/stream-chat-swift.git` if you do not have your Github SSH keys available in this VM
git clone git@github.com:GetStream/stream-chat-swift.git code/stream-chat-swift

# Clone the Stream Doc CLI tool into code/stream-chat-docusaurus-cli
# Use `https://github.com/GetStream/stream-chat-docusaurus-cli.git` if you do not have your Github SSH keys available in this VM
git clone git@github.com:GetStream/stream-chat-docusaurus-cli.git code/stream-chat-docusaurus-cli

# Change directory to the CLI tool dir
$ cd code/stream-chat-docusaurus-cli

# Run yarn and link the CLI tool:
$ yarn
$ npm link

# Switch to the directory with our Swift SDK code
$ cd ~/code/stream-chat-swift

# Run Docusaurus on our Swift code through our CLI tool
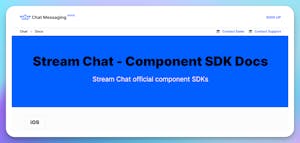
$ npx stream-chat-docusaurus -sOnce the message client (webpack 5.65.0) compiled successfully appears, in your browser, navigate to http://docs.local:3000/chat/docs/sdk/ and you should see:

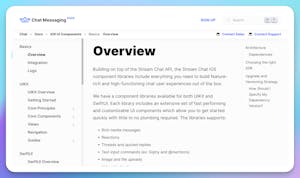
Click on that "iOS" button and it gets even better:

And to clean things up when you are done:
./rmvm docsBy using Multipass and a few convenient scripts, I am able to create a runtime environment for Stream docs without having to worry about the side effects of anything that might have ended up on my system. If it turns out to be broken after a while, a full reset of my Docusaurus environment takes just a few minutes. I am also using Multipass VMs more and more when looking at other people’s code. I like the idea of being able to work on something in total isolation from anything else I am working on.
If you add something like VSCode remote development to connect and edit on your Multipass VMs, the experience is even better.
Remember the avahi daemon we installed on our Multipass VM. Having things available locally on a .local TLD only adds to the convenience.
One could ask, why not use Docker instead? I think it is a matter of preference. Also, when using Docker you have to rely on Docker Compose. An amazing tool, but I just want to have a lot of control over a basic runtime environment. Once I am happy with what I created in/with Multipass, turning that into a Docker Compose configuration is quite easy.